"Win7 VPN Setup" 修訂間的差異
| 行 13: | 行 13: | ||
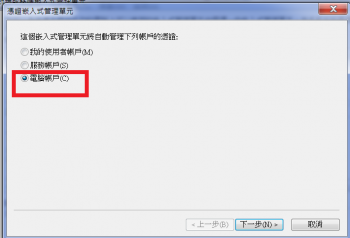
*選擇「電腦帳戶」<br>[[File:Win7_mmc3.PNG|350px]] | *選擇「電腦帳戶」<br>[[File:Win7_mmc3.PNG|350px]] | ||
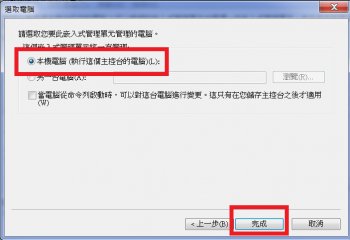
*選擇「本機電腦」->再按「完成」<br>[[File:Win7_mmc4.PNG|350px]] | *選擇「本機電腦」->再按「完成」<br>[[File:Win7_mmc4.PNG|350px]] | ||
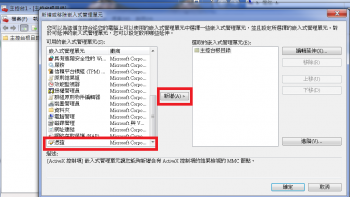
| − | * | + | *回到新增或移除嵌入式管理單元,點選「確定」按鈕 |
|-valign="top" | |-valign="top" | ||
|4.回到主控台<br> | |4.回到主控台<br> | ||
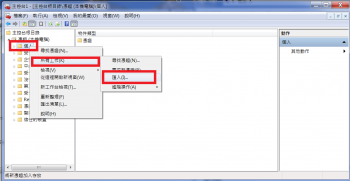
| − | *點選憑證-> | + | *點選憑證->個人,按右鍵->選擇「所有工作」->「匯入」<br>[[File:Win7_mmc6.PNG|350px]] |
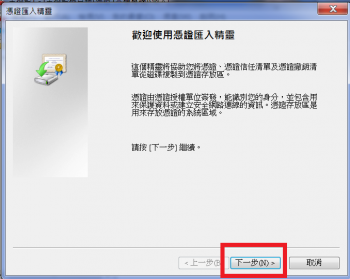
| − | * | + | *出現憑證匯入精靈,點選「下一步」<br>[[File:Win7_mmc7.PNG|350px]] |
|5.<br> | |5.<br> | ||
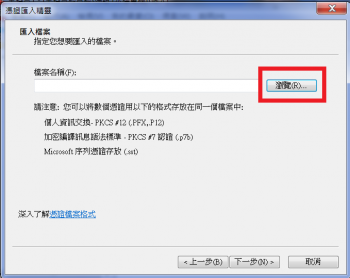
*選擇「瀏覽]<br>[[File:Win7_mmc8.PNG|350px]] | *選擇「瀏覽]<br>[[File:Win7_mmc8.PNG|350px]] | ||
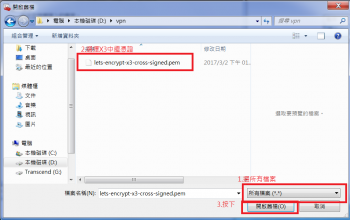
| − | * | + | *檔案類別選擇「所有檔案」,將下載的X3中繼憑證開啟<br>[[File:Win7_mmc9.PNG|350px]] |
|6.<br> | |6.<br> | ||
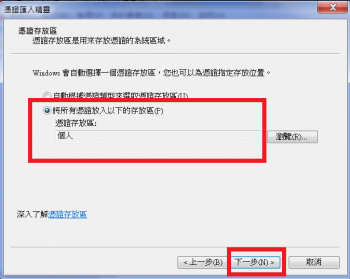
| − | * | + | *憑證存放區,放在個人。點選「下一步」<br>[[File:Win7_mmc10.PNG|350px]] |
| − | *點選「完成] | + | *點選「完成]按鈕,完成憑證匯入精靈 |
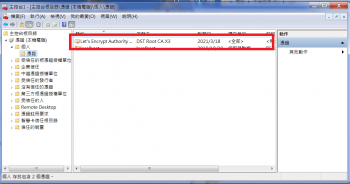
| − | * | + | *主控台個人憑證,出現Let's Encrypt X3中繼憑證<br>[[File:Win7_mmc12.PNG|350px]] |
|} | |} | ||
2.設定VPN連線 <br> | 2.設定VPN連線 <br> | ||
| 行 34: | 行 34: | ||
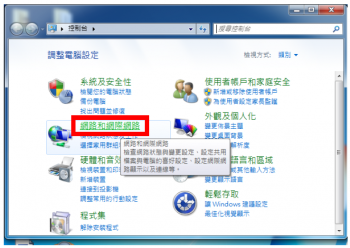
2.打開「網路和網際網路」介面<br>[[File:Win7_vpn2.PNG|350px]]<br> | 2.打開「網路和網際網路」介面<br>[[File:Win7_vpn2.PNG|350px]]<br> | ||
| | | | ||
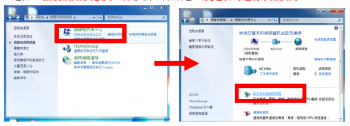
| − | 3. | + | 3.選擇「檢視網路狀態及工作」後,再點選「設定新的連線或網路」<br>[[File:Win7_vpn3.PNG|350px]]<br> |
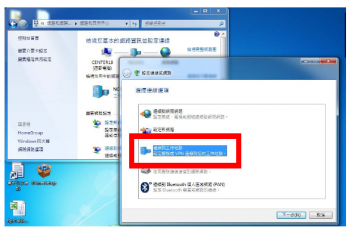
| − | + | 4.選擇「連線到工作地點」<br>[[File:Win7_vpn4.PNG|350px]]<br> | |
| − | + | | | |
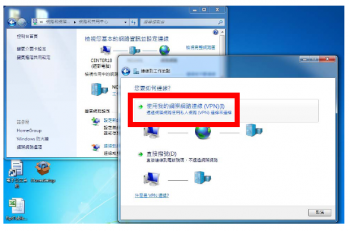
| + | 5.選擇「使用我的網際網路連線(VPN)」<br>[[File:Win7_vpn5.PNG|350px]]<br> | ||
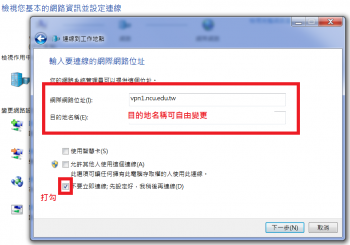
| + | 6.輸入連線網址:vpn1.ncu.edu.tw ,,勾選「不要立即連線;……」。<br>[[File:Win7_vpn6.PNG|350px]]<br> | ||
| + | |-valign="top" | ||
| + | | | ||
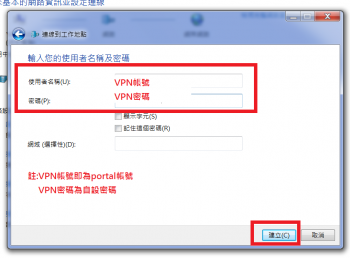
| + | 7.輸入申請的VPN 帳號及密碼後,按「建立」。<br>[[File:Win7_vpn7.PNG|350px]]<br> | ||
| + | | | ||
| + | | | ||
|} | |} | ||
於 2017年3月3日 (五) 03:05 的修訂
1.請下載憑證及安裝憑證
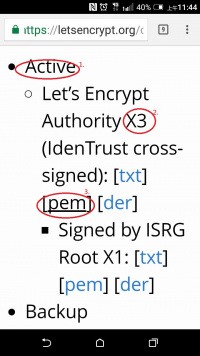
| 操作說明... | 1.下載網址 https://letsencrypt.org/certificates ,請注意 |
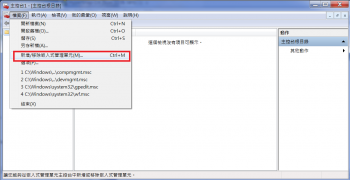
2.執行mmc |
3. |
| 4.回到主控台 |
5. |
6. |
2.設定VPN連線
| 操作說明... |
5.選擇「使用我的網際網路連線(VPN)」 | ||
